
SIZE GUIDE
Understanding the Design & Finding YOUR SIZE
Every bracelet adjusts, but only within a range. Each size tightens down to a minimum and opens out from there, so the right size is the one whose range your wrist falls inside.
Measure your bare wrist first — not a bracelet you already own. Wrap a strip of paper just below the wrist bone, mark the overlap, and lay it flat against a ruler. Then choose your bead size above and slide to your number.
If two sizes cover your measurement, take the smaller one for a more flush fit.
Please note: A bracelet can always be worn looser, but it can't be made smaller than its smallest adjustable dimension.
USING OUR SIZING TOOL
Pick your bead size — 8mm, 10mm or 12mm. It's listed on every product page. The bead counts under each button show what you'd get.
Slide the marker to your wrist measurement. The red line on the tape follows you.
Read your size below the tape. You'll get the size name, how many beads it has, and the exact wrist range it adjusts across.

1 · Bead size
2 · Your wrist measurement
Medium
How the fit works
It opens
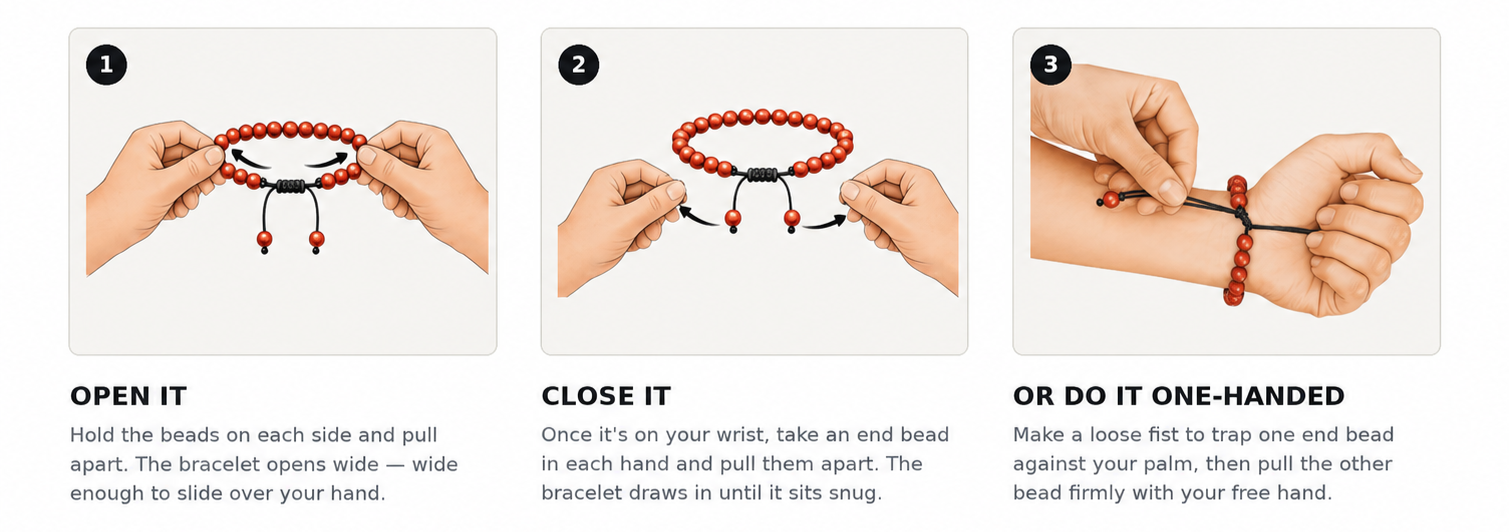
Slide the knots apart, widen the bracelet, and pass it over your hand.
It tightens
Pull the two beaded cord ends and the bracelet closes down onto your wrist.
It has a floor
The beads and center bead are a fixed length, so each size only closes so far. That's what the sizes are for.
How to measure
Wrap a strip of paper around your wrist
Cut a strip about half an inch wide. Wrap it just below the wrist bone, where a bracelet naturally sits. Snug against the skin, not tight — this is your bare wrist, not the bracelet.
Mark where the ends overlap
Hold the strip in place and mark the overlap with a pen. A ribbon or piece of string works just as well.
Lay it flat and measure to the mark
That number is your wrist measurement. Round to the nearest quarter inch and use it above.
Every size
| Bead | Size | Beads | Fits wrist |
|---|